23.3 Reference: Command Line Options
Before we get into the details it is useful to review the dia
command line options. Dia supports all of the usual GNOME, GTK+ and
Session Management options which are listed with the
{-help} option. In addition dia has just a single
option, {-export}, abbreviated as -e. This will
generate an exported graphic of the supplied dia diagram in one of
the supported export formats. The particular export format is
determined from the supplied filename extension. Thus,
generates an Encapsulated PostScript image while
generates a Portable Network Graphics image.
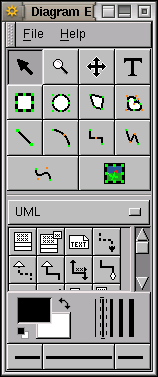
%## Reference: The Tools Windows
23.3.1 Pointer, View, and Text Objects
The top section of the main dia window contains the pointer and a collection of standard shapes. The pointer (the top left icon with the arrow) allows you to select objects on the dia canvas.
Next to the pointer are the zoom and scroll buttons. The zoom tool
will enlarge (zoom in on) the diagram each time you click the left
mouse button somewhere within the diagram. By holding down the
Shift key when using the zoom tool the diagram will be
zoomed out. The scroll tool will scroll the diagram when you hold the
left mouse button down within the diagram.
 This mimics
moving the scroll bars. By holding down the
This mimics
moving the scroll bars. By holding down the Shift key
when using the scroll tool you can grab (as with a hand) the diagram
and scroll the diagram around in this way.
The fourth button selects the Create Text tool allowing text to be added to your diagram.
23.3.2 Standard Shapes
The second collection of four buttons on the main window consist of the standard shapes of a Box, Ellipse, Polygon, and a Beziergon.
The next group of five buttons are line drawing tools consisting of a Line, Arc, Zigzagline, Polyline and Bezierline.
The final button allows you to import graphics from other applications.
Double click the left mouse button on the tool button to set the
object defaults for that object (not all
objects have defaults). For example, double clicking the Create Text
tool button will bring up a window to set defaults for the alignment
of the text, the font, and the font size. The Box object defaults
include whether the background is drawn and how the corners are
rounded. The Ellipse,
 %
Polygon, and Beziergon object defaults allow for turning off of the
drawing of the background. The only other standard shape with object
defaults is the Image tool which can identify a default image file,
whether a resize of the image should keep the aspect ratio, and
whether to show a border around the image. Objects from the various
sheets may also offer object defaults.
%
Polygon, and Beziergon object defaults allow for turning off of the
drawing of the background. The only other standard shape with object
defaults is the Image tool which can identify a default image file,
whether a resize of the image should keep the aspect ratio, and
whether to show a border around the image. Objects from the various
sheets may also offer object defaults.
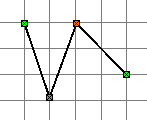
23.3.3 Handles and Connection Points
All objects have handles that generally allow the
object to be resized. The usual handles are small boxes with a green
fill. You can move these handles by dragging them with the mouse.
This will resize the object. If the handles have a dark blue fill
instead then
 %
the object can not be resized. This is typical of boxes that resize
automatically as you enter text into the box.
%
the object can not be resized. This is typical of boxes that resize
automatically as you enter text into the box.
Lines have handles at each end that are also green (but also have a
small internal cross identifying it as a connection point—see
 %
below). Once again you can resize the line simply by grabbing these
handles with the left mouse button and moving the handle around.
%
below). Once again you can resize the line simply by grabbing these
handles with the left mouse button and moving the handle around.
Some lines (e.g., a polyline) have internal handles that are coloured
orange. These handles have restricted movement and may also move as
you move the line end-points.
 %
%
Most objects also have connection points that identify locations on the shape to which lines can be snapped. (An Arc, for example, does not have any connection points.) They are identified as the small blue crosses on the edges of the objects. The handles on the end of lines also have crosses identifying connection points. A line’s connection point becomes attached to the connection point of an object, as indicated by the line’s green handle becoming red. Moving the object will also move all of the attached lines.
The Line shape can have extra connection points added to it through the middle mouse button menu. Each new connection point is added to evenly space all of the connection points along the line.
23.3.4 Sheets
The next section of the main dia window begins with a choice
of sheets (i.e., shape libraries). Many are included by default and
new ones can be added (see Section ??).
Selecting one of the available sheets (by choosing from the pull-down
menu that is labelled UML for the Universal Modelling Language in the
above sample window) will display a collection of shapes associated
with the particular sheet. (The sample window includes the shapes
useful for drawing UML diagrams.) Some shapes, when selected and
placed onto the canvas, have text associated with them and will grow
in size depending on the text you type. An example is the Text box
button.
 %
%
Increasing the height of the main dia window will often allow you to see all of the available shapes of any of the sheets at one time.
23.3.6 Lines
The line thickness and line types. These affect the standard shapes rather than shapes from the sheets. The smallest line width is 0pt (hairline).
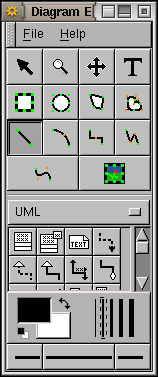
A variety of lines are supported. You can add arrows to the lines by clicking on the button at the bottom right (or bottom left for backwards pointing arrows) of the Dia control window. Figure ?? shows the button before and after selecting an arrow.
![]()
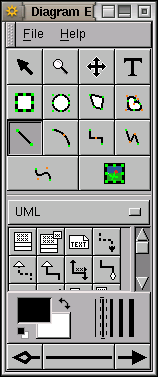 . We have chosen the straight line tool in
the top half of the window. An arrow is added in the second, a
backward arrow with a hollow head in the third, and the line is
changed to a dotted line in the fourth. {#fig:dia-uml-arrow}
. We have chosen the straight line tool in
the top half of the window. An arrow is added in the second, a
backward arrow with a hollow head in the third, and the line is
changed to a dotted line in the fourth. {#fig:dia-uml-arrow}
Your donation will support ongoing availability and give you access to the PDF version of this book. Desktop Survival Guides include Data Science, GNU/Linux, and MLHub. Books available on Amazon include Data Mining with Rattle and Essentials of Data Science. Popular open source software includes rattle, wajig, and mlhub. Hosted by Togaware, a pioneer of free and open source software since 1984. Copyright © 1995-2022 Graham.Williams@togaware.com Creative Commons Attribution-ShareAlike 4.0